How to Install Metal Roofing Sheets
Installation Guide 34/1000
Installation Guide Corrugated
Installation Guide Tileform
Installation Guide Flashing
Installation Guide
This installation guide provides general advice on how to install a single skin sheeted metal roof. The advice within this installation guide is of a limited nature and should only be used as a guide. It's not be relied upon as an exact instruction on how a roof should be safely installed which will vary with circumstances.
We have a skilled team of Customer Service advisors who will be happy to assist you with any installation queries you have, please feel free to call them on 01837 659 901. Cladco Profiles accepts no liability for any loss or injury caused by any reliance placed on this guide.
Cutting Sheets On-Site
Cladco Profiles will deliver your sheets to you at the exact size you need them, so providing you send over the correct measurements, you shouldn’t need to cut them yourself. We do understand, however, that sometimes this cannot be avoided, and you may need to further trim your cladding. In this instance, we have some recommendations which should aid you in cutting your sheets effectively in the shortest amount of time possible, with no mistakes.
If necessary, we recommend seeking advice from a professional prior to cutting sheets.
Firstly, you’ll need to ensure you take measurements of the roof, so you know exactly how much you need to cut. Never guess this step, it could end up being a costly mistake. Mark the cut-lines with a felt-tip pen or a Sharpie: a pencil won’t do this time.
If you need to cut your roof, we always recommend doing so on the ground. Cutting metal while on a roof is dangerous and could result in serious injury. Lay your profile sheets face down across padded supports. Doing this will stop scratching and will make the process much easier.
When choosing your tools, If necessary, we recommend seeking advice from a professional. You may wish to use a tool that will produce as little heat as possible. Heat can damage the coating on the sheet and thus cause discolouration, scratching and in some respects could ruin your anti-condensation felt attachment. For longer, straight cuts using a circular saw with a fine-tooth metal cutting blade that produces a cold cut is often advised. If you only need to make smaller cut-outs and openings, or for cuts that are not straight, a jigsaw or reciprocating saw may be recommended by a professional.
In some instances, you may be recommended to use an angle grinder with a small tooth blade or disc when cutting metal classing. Reciprocating nibblers are widely used in the roofing trade, and these produce an excellent, clean cut.
As you can see, there are a wide variety of tools you may wish to use when cutting sheets, however you must always seek advice before cutting from a qualified professional. Cladco accept no responsibility for any injury or accident that may have occurred by using the above tools. We do not recommend any specific tools but recommend the advice from a qualified professional.
Remember to remove any swarf with a brush to prevent damage to the sheet.
Installing Roof Sheets
At Cladco, we want to ensure that once you’ve purchased our roofing sheets that you know exactly how to lay roof sheets, tile sheets and more in the preferred way. Laying metal sheets in runs is normally the best way to achieve this and we recommend by starting at the eaves and in the corner away from the direction of the prevailing wind (If it’s a single sheet run). This will help prevent side laps facing into the wind and water ingress.
We recommend when laying your first few sheets to not fully fix them until you are sure they are correctly aligned. This can help mitigate the impact of any false starts to begin with and only once you are sure, is it best to put the remaining fixings in and carry on with the build.
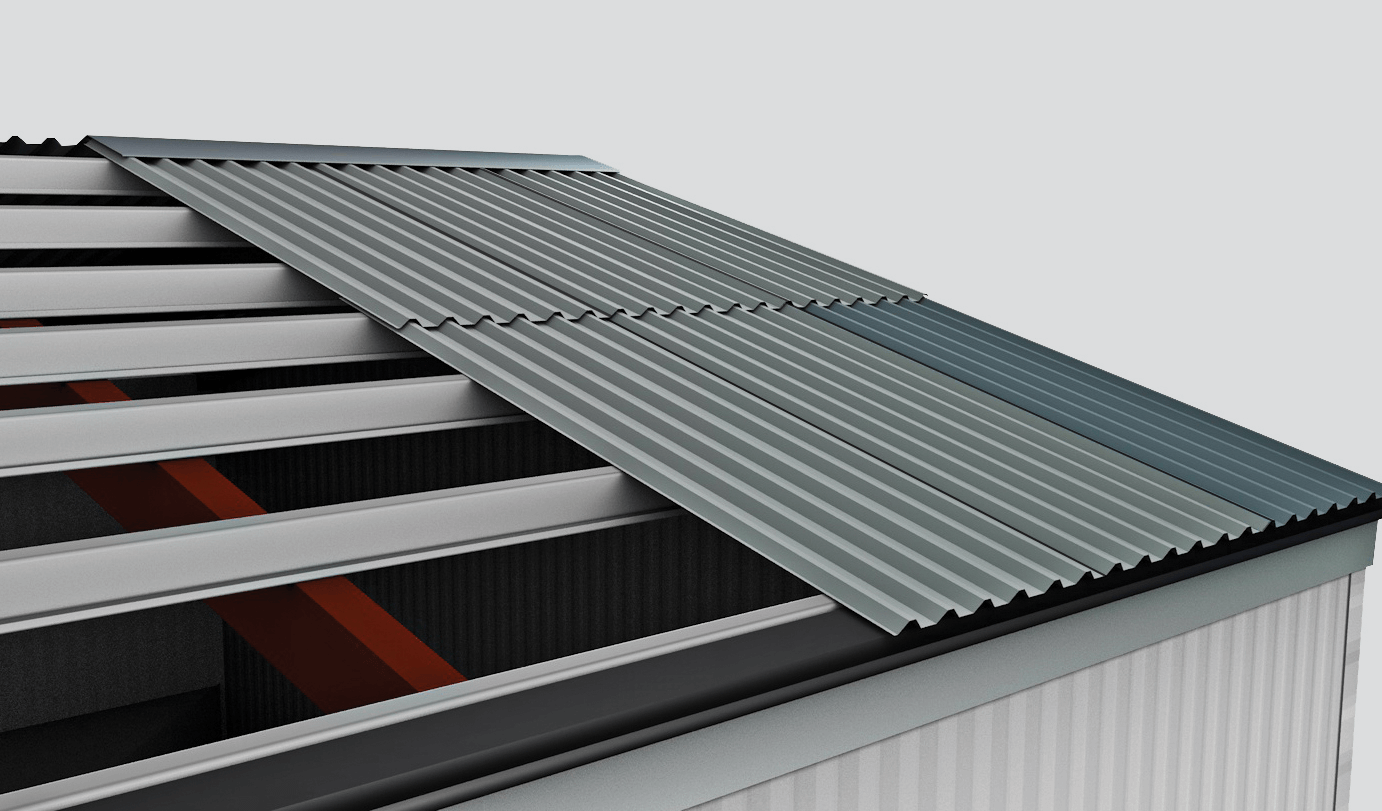
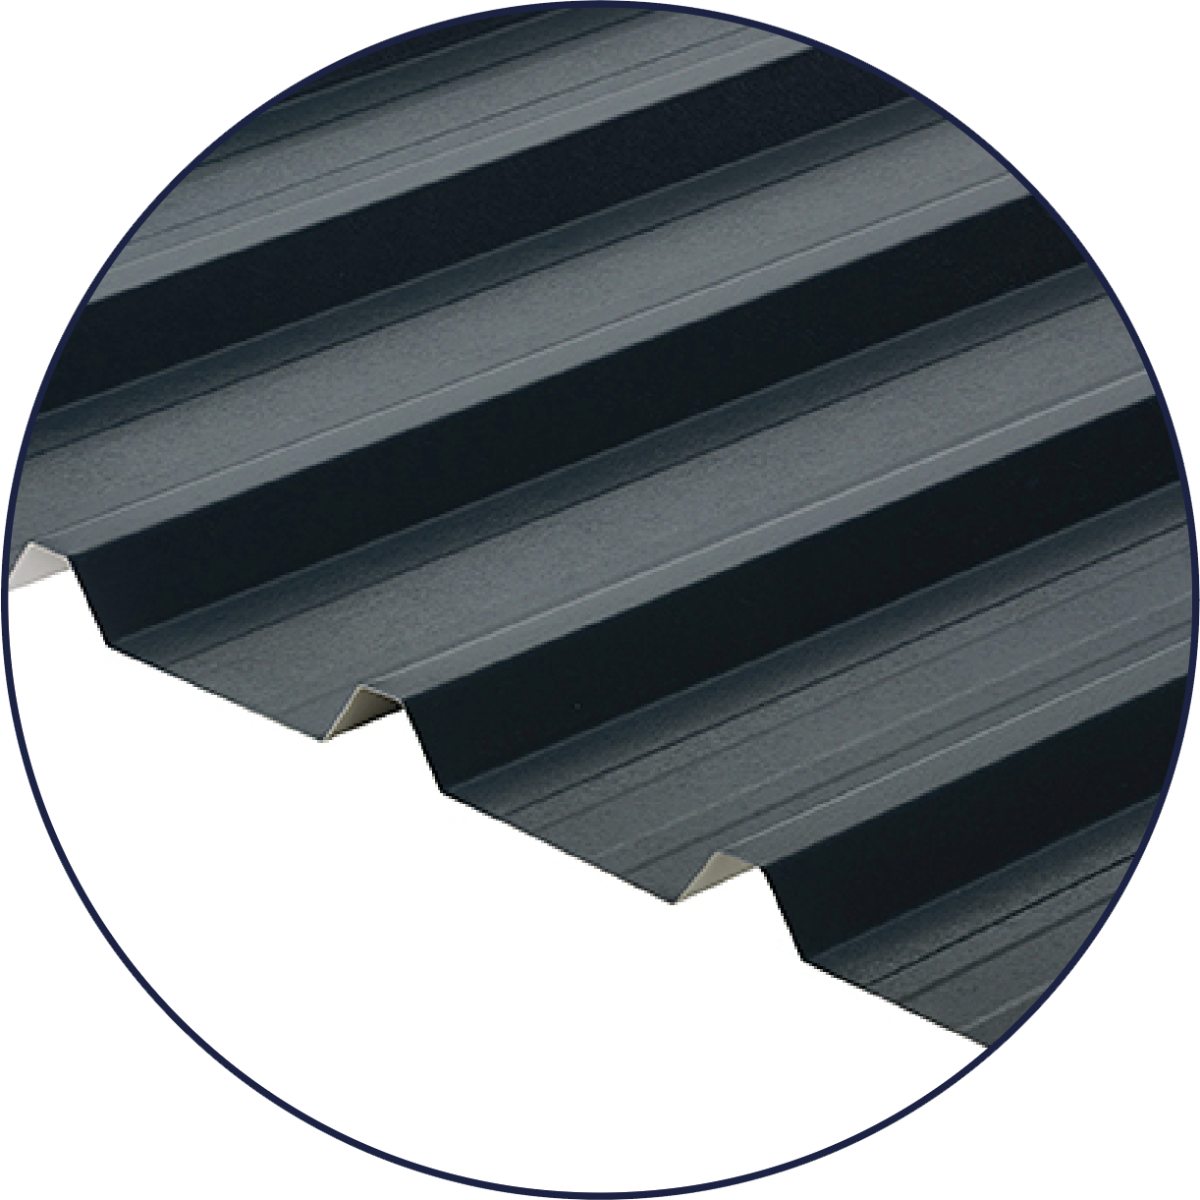
Installing Box Profile Roof Sheets
For a single pitch roof the minimum pitch we recommend is 4-5º. Lay Box Profile sheets in runs. Start at the eaves and in the corner away from the direction of the prevailing wind (this will help to prevent side laps facing into the wind and water ingress). If the first sheet is not laid perpendicular to the eaves and ridge, adjustments will have to be regularly made when laying other sheets and a ‘saw tooth’ effect at the eaves will be seen. This may be unavoidable if the building is not square.
The first row of sheets should extend over the bottom purlin and the eaves so that rainwater can drain into a gutter or beyond the wall.
Sheets should be overlapped by the next sheet in the run by at least one profile or corrugation (‘side laps’).
Please note – maximum length of sheet we can supply is up to 9m. If you require a longer length, you will need to do a 2-sheet run as per image above.
You should always overlap the sheets by at least one corrugation. When overlapping sheets its recommended to use mastic lapping tape.
For side laps. It is good practice to use mastic lapping tape and stitching screws to ensure a robust weather resistant joint on side laps. Lapping tape with a section of 9mm x 1.5mm mastic should be run along the crest of the profile that is to be lapped, sheet to sheet stitching screws should then be used at 600mm intervals down the lap to consolidate the bond created by the lapping tape.
For end laps a minimum sheet over sheet overlap of 250mm should be allowed for where sheets lap, this lap must be supported underneath by a purlin. As with side laps, it is good practice to use lapping tape to help create a robust weather resistant joint. A strip of tape should be placed across the full width of the lap approximately 25mm from the end of the top end of the overlapped or bottom sheet. Lapping tape is considered more effectively than silicone.
Installing Tile Form Roof Sheets
For a single pitch roof the minimum pitch we recommend is 12 degrees Tile Form sheets must always be laid from right to left. When laying the first sheet it should be offered onto the roof to get the purlins in the correct place as when fixing the sheets, the screw will be in line with the purlins. Screws and purlins will match, fixings go just under the tile drop (curved aspect of sheet pattern)
Please note – maximum length of sheet we can supply is 6m. If you require a longer length, you will need to do a 2-sheet run.
If a two-sheet run is required, lay the sheets in this position and use the same fixing instructions as above.
Tile sheets have to be laid from right to left sequence, starting on the right-hand side of the roof laying on the next sheet to the left, lapping over the profile with the small gully detail on the last lap of the left of the sheet.
You should always overlap the sheets by at least one corrugation.
Tap each new sheet tight into place where it laps before the fixings and mastic tape are used. We suggest using a soft wood block and a mallet with some rag between the block and the sheet to prevent damage the sheet coating.
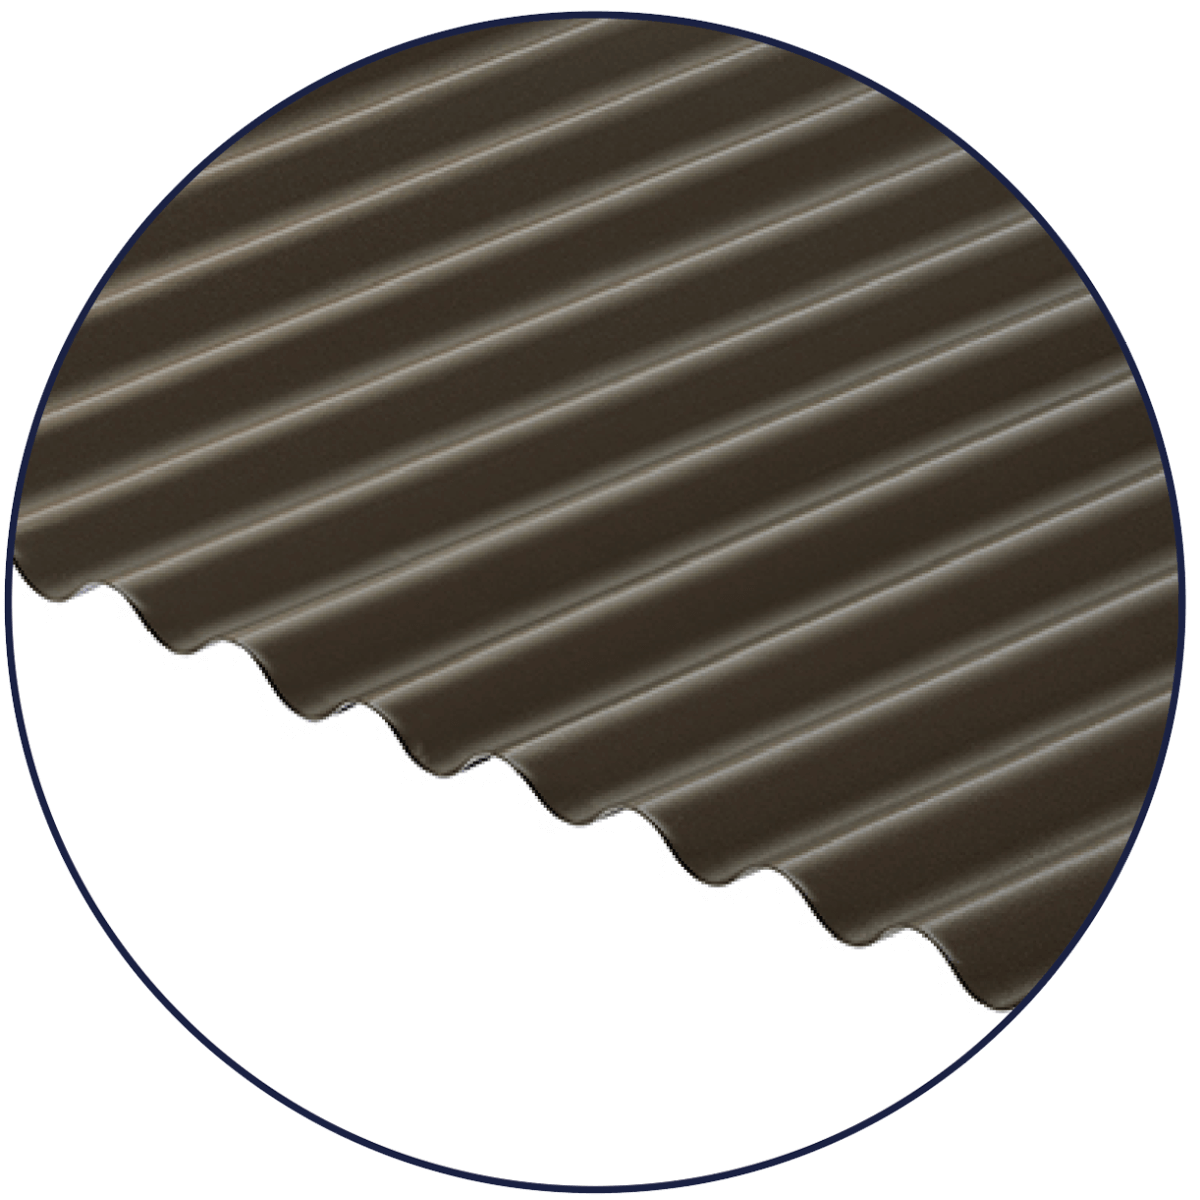
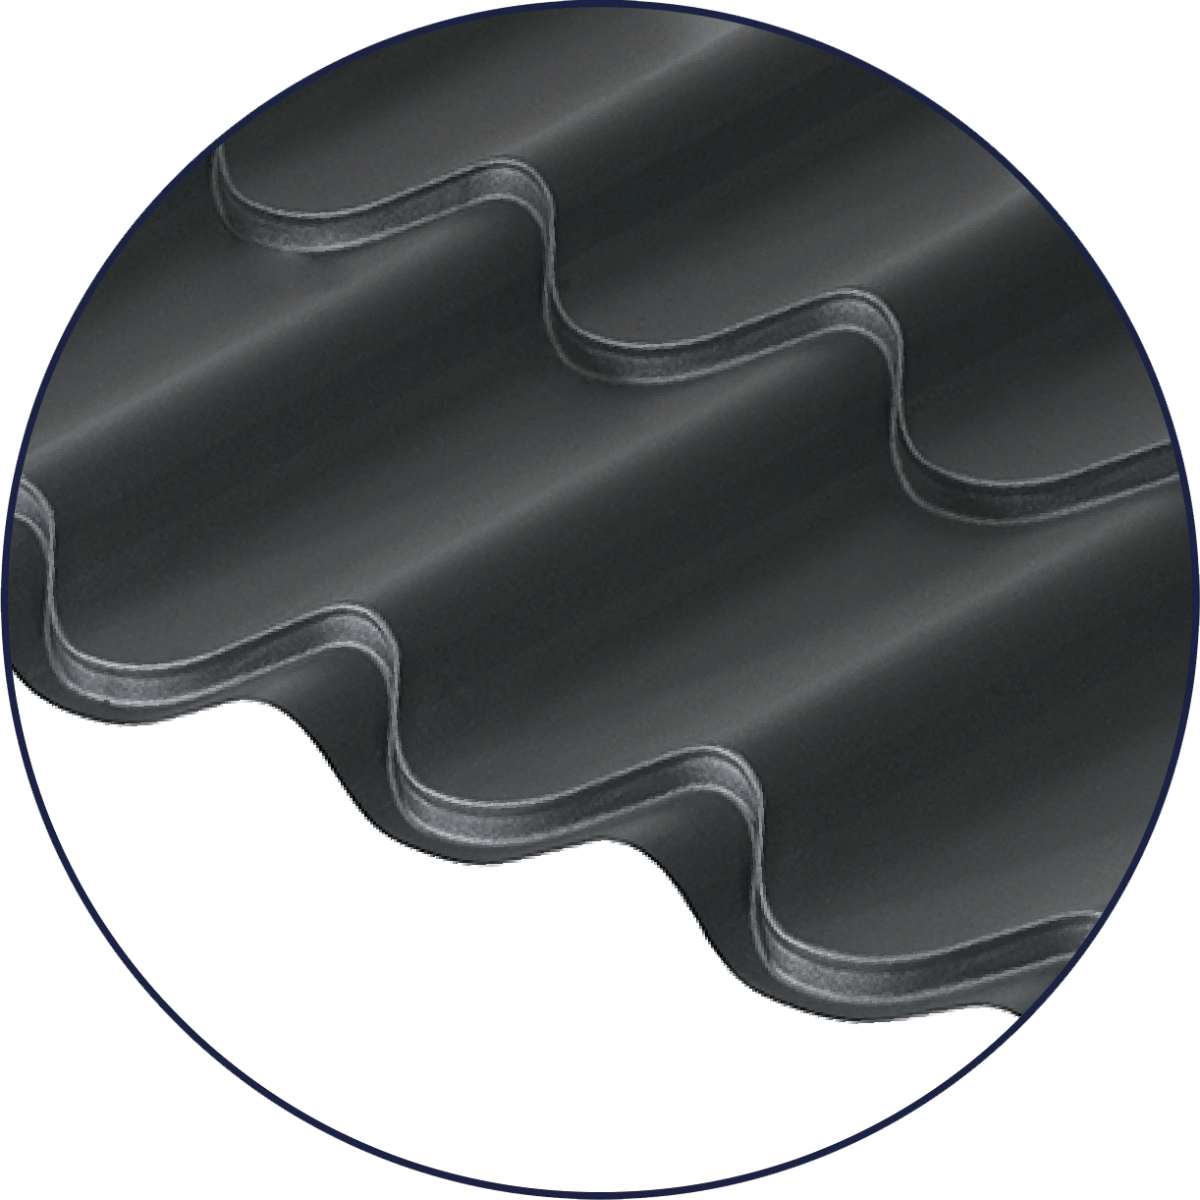
Installing Corrugated Roof Sheets
For a single pitch roof the minimum pitch we recommend is 10 degrees. For a single run of sheets start at the eaves and in the corner away from the direction of the prevailing wind (this will help to prevent side laps facing into the wind and water ingress). If the first sheet is not laid perpendicular to the eaves and ridge, adjustments will have to be regularly made when laying other sheets and a ‘saw tooth’ effect at the eaves will be seen. This may be unavoidable if the building is not square.
The first row of sheets should extend over the bottom purlin and the eaves so that rainwater can drain into a gutter or beyond the wall.
Sheets should be overlapped by the next sheet in the run by at least one profile or corrugation (‘side laps’).
Please note – maximum length of sheet we can supply is up to 5m in 0.5mm thickness and 7m in 0.7mm thickness. If you require a longer length, you will need to do a 2-sheet run as above.
You should always overlap the sheets by at least one corrugation. When overlapping sheets its recommended to use mastic lapping tape.
For side laps. It is good practice to use mastic lapping tape and stitching screws to ensure a robust weather resistant joint on side laps. Lapping tape with a section of 9mm x 1.5mm mastic should be run along the crest of the profile that is to be lapped, sheet to sheet stitching screws should then be used at 600mm intervals down the lap to consolidate the bond created by the lapping tape.
For end laps a minimum sheet over sheet overlap of 250mm should be allowed for where sheets lap, this lap must be supported underneath by a purlin. As with side laps, it is good practice to use lapping tape to help create a robust weather resistant joint. A strip of tape should be placed across the full width of the lap approximately 25mm from the end of the top end of the overlapped or bottom sheet. Lapping tape is considered more effectively than silicone.
Tap each new sheet tight into place where it laps before the fixings are used. We suggest using a soft wood block and a mallet with some rag between the block and the sheet to prevent damage the sheet coating.
Flashings
Ridge Caps
Lay ridge caps from the opposite end of the roof to the direction of prevailing wind. Each cap should be overlapped by the next cap in the run by a minimum of 150mm.
We recommend ridge caps are fixed using self-drilling TEK type stitching screws through the highest point of each profile they cover and the appropriate ridge filler, if one is being used. This helps to ensure a robust weather-resistant joint, as well as keeping out birds and vermin.
Please note - when constructing your purlin support structure you may need to consider additional purlins to support your ridge caps and other flashings.
Barge
Barges, otherwise known as Verges or Barge Boards, refer to the Fascia Boards fitted at the Gable End (section of the wall located at the roof’s pitch). Adding a Barge to your project should occur after your roofing sheets have been fitted to your Roofing Project correctly. Position your Barge and ensure you have a 200mm minimum overlap at either end.
We advise attaching your Barge with self-drilling 22mm TEK type stitching screws. Fix your stitcher screws at regular intervals of no more than 400mm apart and at all key structural points. The top part of your Barge should be screwed into the roofing sheet below. When attaching your Barge to the sheet below, ensure to screw into the profile following the roofing sheet’s recommendations, either through the profile or the valley, depending on profile. You may want to attach colour caps to the heads of the screws for a seamless design.
Side and End Laps
When you’re looking to tackle side lap roofing, it’s good practice to use mastic lapping tape and stitching screws to help ensure a robust weather-resistant joint on side laps. Lapping tape with a section of 9mm x 1.5mm mastic should be run along the crest of the profile that is to be lapped. Using lapping tape is considered to be much more effective than using silicone and will help align the lapping perfectly at the first time of trying.
Sheet to sheet stitching screws should then be used at 600mm intervals down the lap to consolidate the bond created by the lapping tape. This way, your side lap roofing will be made to last and be as robust as possible.
Side Lap Roofing & End Lap Joints
For end lap joints, a minimum sheet over sheet overlap of 250mm should be allowed for where the sheets lap. This lap must be supported underneath by a purlin to be secure and long-lasting.
As with side lap roofing, it’s good practice to use lapping tape to help create a robust weather-resistant joint. You should use a strip of tape placed across the full width of the lap, approximately 25mm from the end of the top end of the overlapped or bottom sheet. At Cladco, we recommend using the mastic tape wisely as it is very difficult to separate the roofing sheets once they are joined by lapping tape. Always make sure of where the sheet is positioned before placing one sheet on top of another, this way you’ll get it on the first attempt.
Roof Safety & Protective Equipment
Roofing work can be hazardous. Caution should be exercised and appropriate safety precautions taken including the wearing of suitable protective gloves, clothing, footwear and hard hat.
Two people may be able to lift a single sheet at a time off a delivery truck, depending on their own physical ability and weather conditions. This will also depend on the length of sheet and weight. The weight of sheets are given on the website. Extra care should be taken in windy or exposed areas. The edges of sheets and flashings can be sharp so remember to wear protective gloves with rubber palms for grip.
UK law requires employers and self-employed contractors to formally assess the risks associated with each roofing job and, before starting their work, to plan and organise their work so that it is carried out in a safe manner. Further information on this and working at heights, other applicable legislative requirements can be found by visiting the Health and Safety Executive’s website www.hse.gov.uk.
While this isn’t a definitive guide to keeping yourself safe while working on a roof, we have included some basic roof safety tips here. Cladco Profiles accepts no liability for any loss or injuries caused while following this guide. Please ensure you adhere to health & safety best practice at all times.
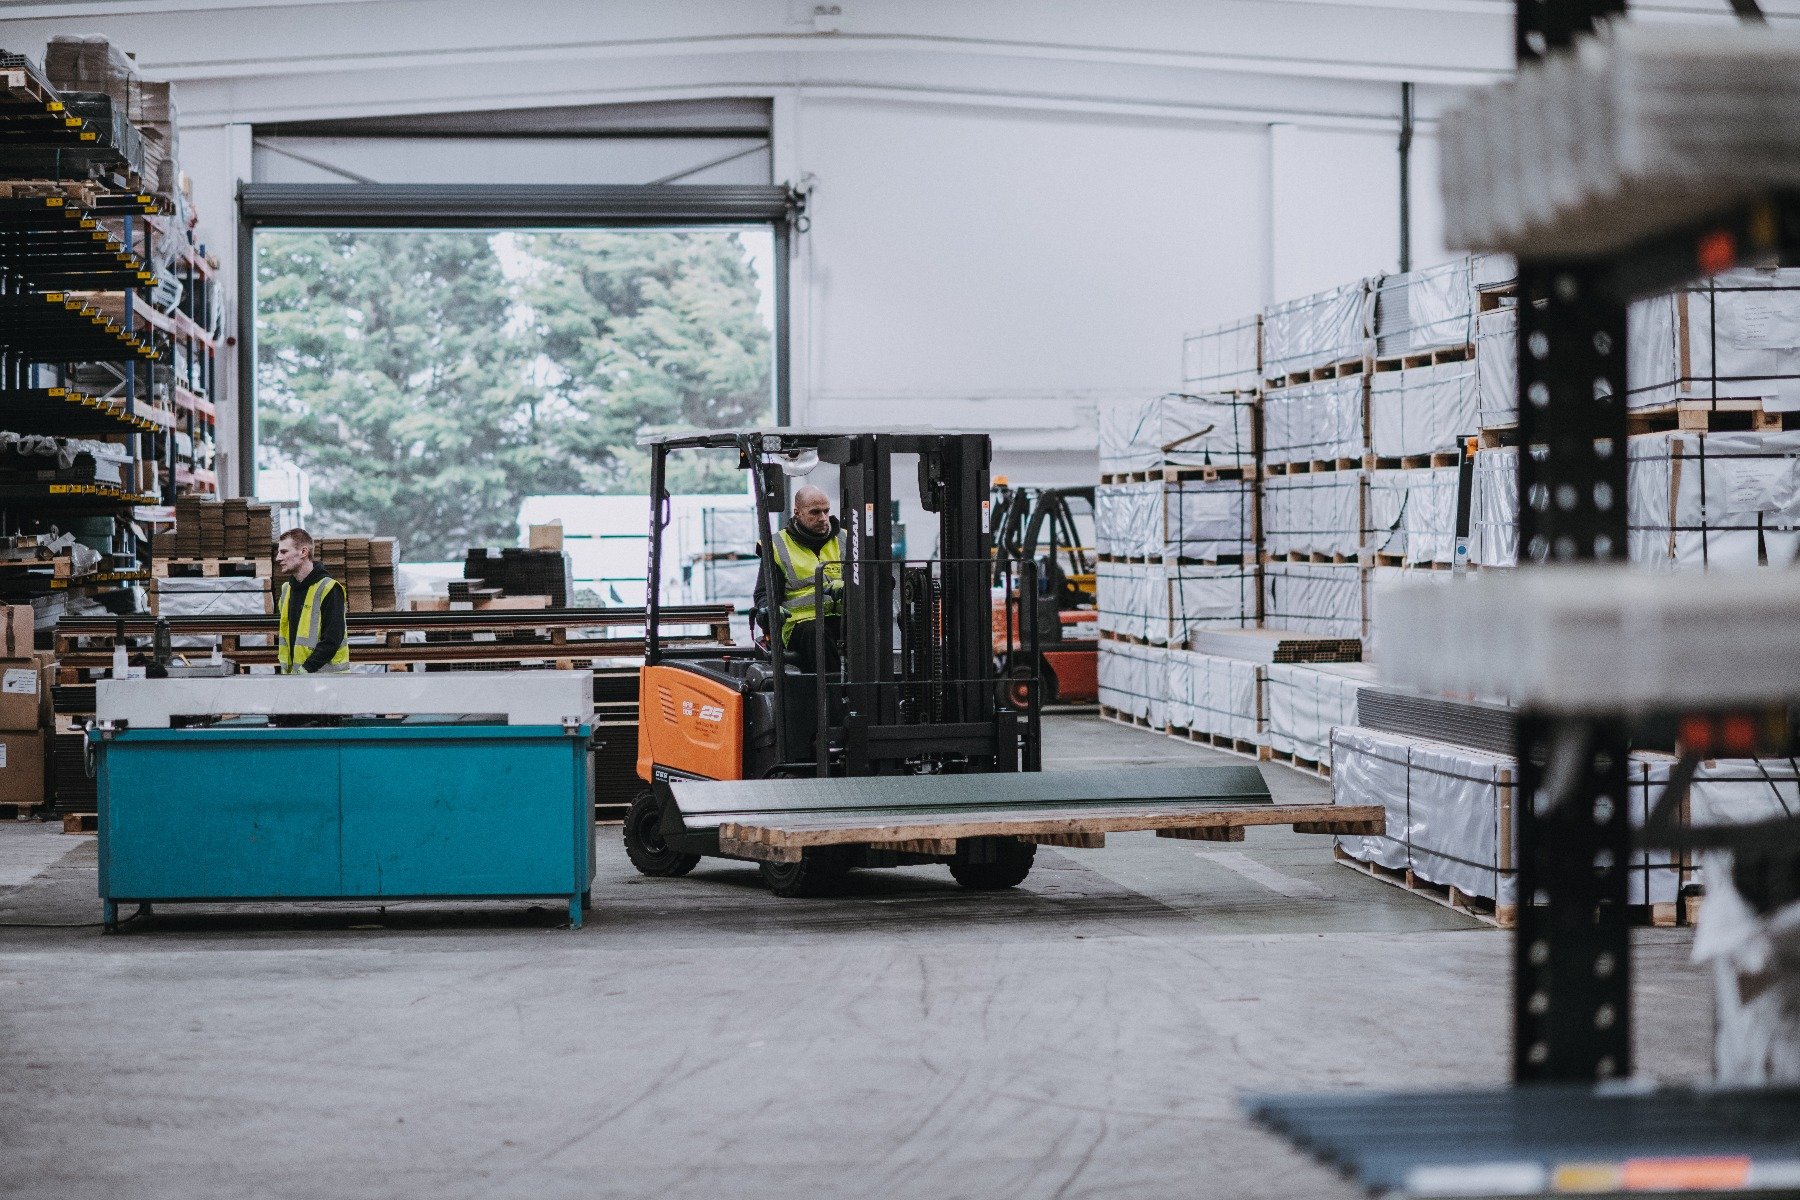
Care should be taken when handling sheets to prevent damage and injury during installation. If possible, mechanical handling equipment should be used. Dragging one sheet’s edge across another when unloading may cause scratching of the sheet below, so make sure the sheet is lifted clear and not dragged. Any packaging should be removed before lifting sheets onto a roof.
Cladco Profiles Ltd accept no liability for any loss or injury caused by following the information in this guide. If you are unsure about how best to install your roof, we would recommend contacting an experienced professional.

Sheet Handling Equipment & More
Once you have placed the sheets on the roof and prior to fixing them, roofing sheets should be kept secured to the roof and close to the rafter line. It’s best to spread these out as much as possible so that their weight is evenly distributed across the purlins. Any debris that arises should be removed and any off-cuts of insulation, surplus fasteners and similar parts should not be left on the sheeting.
If you cannot use any sheet handling equipment for lifting metal roof panels, then you will need to take precautions to ensure no damage is caused to yourself or the sheets. Make sure you have protective gloves to protect your hands from any sharp edges when handling the sheets and do not lift any sheets on your own. This way you’ll minimise bending the sheets accidentally which will be very difficult to resolve if it happens.
Further information on this and working at heights, other applicable legislative requirements can be found by visiting the Health and Safety Executive’s website.
Lifting Metal Roof Panels
For lifting any roof sheets ensure you have sufficient numbers of people physically able to lift the roofing sheets, but this depends on the length of the sheets you have ordered. Please note weather coditions must be considered before handling. The longer they are, the more risk there is of bending in the middle, so be aware of this when attempting to lift. As we have already stressed, it’s best to look into using mechanical handling equipment for the best results and to help remove any strain on yourself and whoever is helping you.
Here at Cladco, we always want to ensure you have the best possible experience when working with our products, so be sure to browse our full Help & Advice section for guidance on our products. If you have any queries, then please contact us directly via phone or email and we’ll help as quickly as we can to respond. Please check out our FAQs page.
Create a Purlin
Framework
Purlins can be used create a supporting framework and to transfer the loads imposed by the metal sheeting onto the primary building structure. Purlins can be fixed to rafters using boltable cleats.
As a rough guide purlins should be at least 50mm wide to ensure sheets can be easily fixed, and in the case of 0.7mm thickness sheeting, be spaced no further than 1.2m apart. 1m apart in the case of 0.5mm thickness sheeting. Exact requirements will vary if in doubt we suggest obtaining advise from a qualified professional.
All purlin joins or laps should be supported by a rafter.
All purlin joins or laps should be supported by a rafter.
Once purlins have been fitted and a supporting framework created an inspection should be carried out before any further work is carried out. A full apropriate safety check should be carried out, It should include but not limited to:
- The purlin framework is correctly aligned and levelled;
- Purlins are correctly spaced and within specified tolerances;
- There are no protrusions e.g. bolt heads on the face of the framework.
Fixings used to attach roofing sheets to purlins having to be durable and able to withstand considerable wind pressures. The exact type of fixings required will depend on the roofing sheet and purlin type (either timber, light steel or heavy steel), however, we recommend self-drilling TEK type screws with a 5/16th hex-head for optimum performance.
Self-drilling TEK screws have a drill point for drilling through the sheet and purlin before tapping into the purlin itself. Under the head is a 19mm stainless steel washer with a bonded neoprene pad that compresses to create a seal with the roof sheet. The screws can be fitted through the trough or pan sections of a sheet’s profile, or if fixing corrugated sheets, through the crest of the sheet’s profile using a longer screw and a soft BAZ washer. As in their name they are self-drilling tek screws, but if you wish you can use centre punch to indent the metal sheet at the point you want the screw to go through, to keep the screw on course when screwing it in.
How to Fix Roofing Sheets
For Box Profile 34/1000 sheets the fixings required will depend on the material used in the purlins. Cladco offer a range of fixings available to fix into most purlin materials. For example:
Self drilling TEK type screws with a 5/16th hex head and a stainless steel and neoprene bonded saddle washers, used in lower section of sheet profile to fix sheet to either wood or metal purlins. Longer screws up to 175mm in length are available for fixing through insulation materials or boarding.
Self drilling “stitching” TEK screws are available for fixing trims to sheet or sheet to sheet on laps. Colour caps are used to cover screw heads.
To fix the sheets, each 34/1000 Box Profile sheet has 6 troughs, for securing we recommend you fix the sheet into trough 1, 3, 4 and 6. The bottom end of the sheets you can fix in each trough to help prevent wind uplift of the sheets.
Colour caps are used to cover the ends of fixings, this allows the fixing to blend into the sheets colour.
For tile form sheets the fixings required will depend on the material used in the purlins. Cladco offer a range of fixings available to fix into most purlin materials. We suggest a minimum of 45mm screw. For example:
Self drilling TEK type screws with a 5/16th hex head and a stainless steel and neoprene bonded saddle washers, used in lower section of sheet profile to fix sheet to either wood or metal purlins. Longer screws up to 175mm in length are available for fixing through insulation materials or boarding.
Self drilling “stitching” TEK screws are available for fixing trims to sheet or sheet to sheet on laps. Colour caps are used to cover screw heads.
To fix the sheets, each tileform sheet has 5 troughs, for securing we recommend you fix the sheet into trough 1, 3 and 5. The bottom end of the sheets you can fix in each trough to help prevent wind uplift of the sheets.
For corrugated sheets the fixings required will depend on the material used in the purlins. Cladco offer a range of fixings available to fix into most purlin materials. For securing Corrugated sheeting longer screws are required as you are fixing into the crown of the sheet. For example, fixing into wood a 65mm TEK screw with a baz washer is suggested. If you are using alternative purlin materials please speak with our sales team for further advice. Generally, 4-5 fixings are used across the sheet per purlin, 1 fixing must be used in the overlap of the next sheet.
Colour caps are used to cover the ends of fixings, this allows the fixing to blend into the sheets colour.
Another tip to remember is if you use a stretched piece of string along the purlin line, this can make things even easier when looking to keep the fixings in line when the sheet is laid on the purlins. Small things like that can make a big difference with how your roofing turns out; it’s best not to overlook the basics. You’ll find all the parts you need for fixing roofing sheets in our Fixings & Accessories section, as well as all the necessary Z Purlins we stock.
If you need any other advice when installing your build, be sure to check out the other helpful sections in our Help & Advice section. For everything else, please contact us directly by email or phone and we’ll aim to help you quickly.
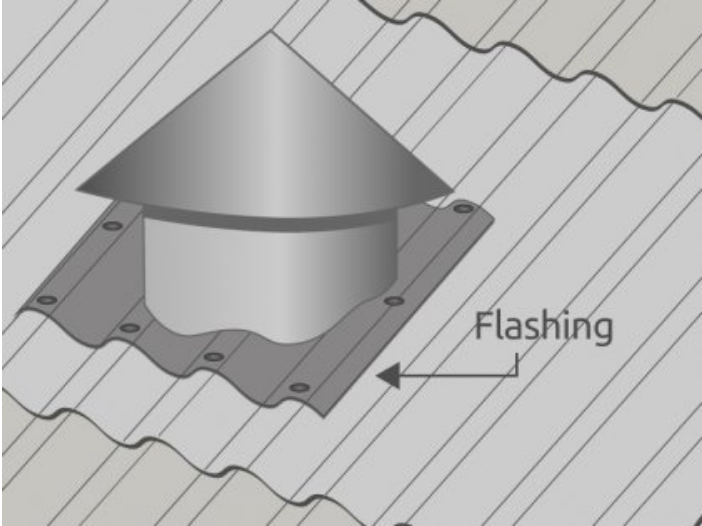
Protrusions
Protrusions such as pipes and ducts should be adequately flashed where they pass through the sheeting surface. Where profile sheeting has to be cut away, to avoid anything seeping through, additional framing should be installed as required to support the sheeting.
Depending on the position of the cut, special attention should be given to back flashing the sheeting to the ridge or point of water entry up the roof from the protrusion.
In all cases, all cutting and flashings should be so arranged that adequate provision is made for the drainage of all troughs and corrugations.
Depending on the type of protrusion you have, (e.g velux windows have their own flashings kit, hot or cold pipes you can use a dektite) you may wish to check with the manufacturer for any flashings kit that is made for your requirements.
How do I Handle Protrusions?
When protrusions are a part of your roofing process, you’ll need to make sure you install adequate flashing and additional framing, where required, to support the sheeting. Depending on the position of the cut through the roof, special attention should be given to roof flashings for pipes, in particular, vent pipes.
Flashings are placed around vents, skylights and plumbing pipes, among other roof protrusions, and are usually made from galvanised steel or any other rust-resistant metal. Occasionally, flashings can be made from plastic, rubber or roofing felt.
In all cases, all cuttings to make way for protrusions and roof flashings should be so arranged that adequate provision is made for the drainage of all throughs and corrugations. As above, please contact the manufacturer for flashings kit.

Further Information
Not sure how much roofing you’ll need? Check out our handy roofing calculator, which will help you work out exactly how much you need to purchase. Please check out our delivery information page for important material on our delivery process and policies. As always, we’d love to hear from you, so contact us with any questions or comments, and browse our FAQs, just in case you need a faster response!
Please Note:
This installation guide should be used a guide only. This information provides general advice on how to install a single skin sheeted metal roof. The advice within this installation guide is of a limited nature and should only be used as a guide its not be relied upon as an exact instruction on how a roof should be safely installed which will vary with circumstances.
We have a skilled team of Customer Service advisors who will be happy to assist you with any installation queries you have, please feel free to call them on 01837 659 901. Cladco Profiles accepts no liability for any loss or injury caused by any reliance placed on this guide.